Foolproof Homemade Caramel Apples: The Secret to Chewy, No-Slide Coating
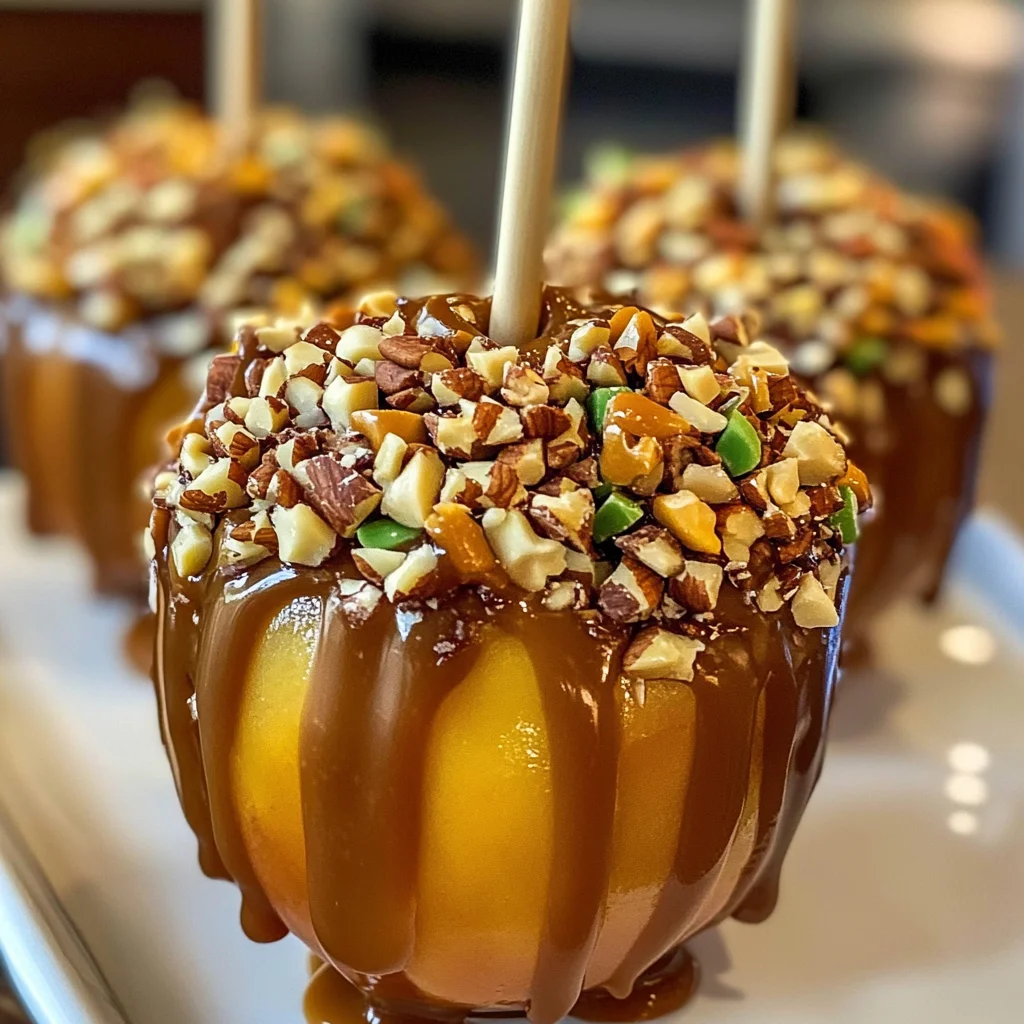
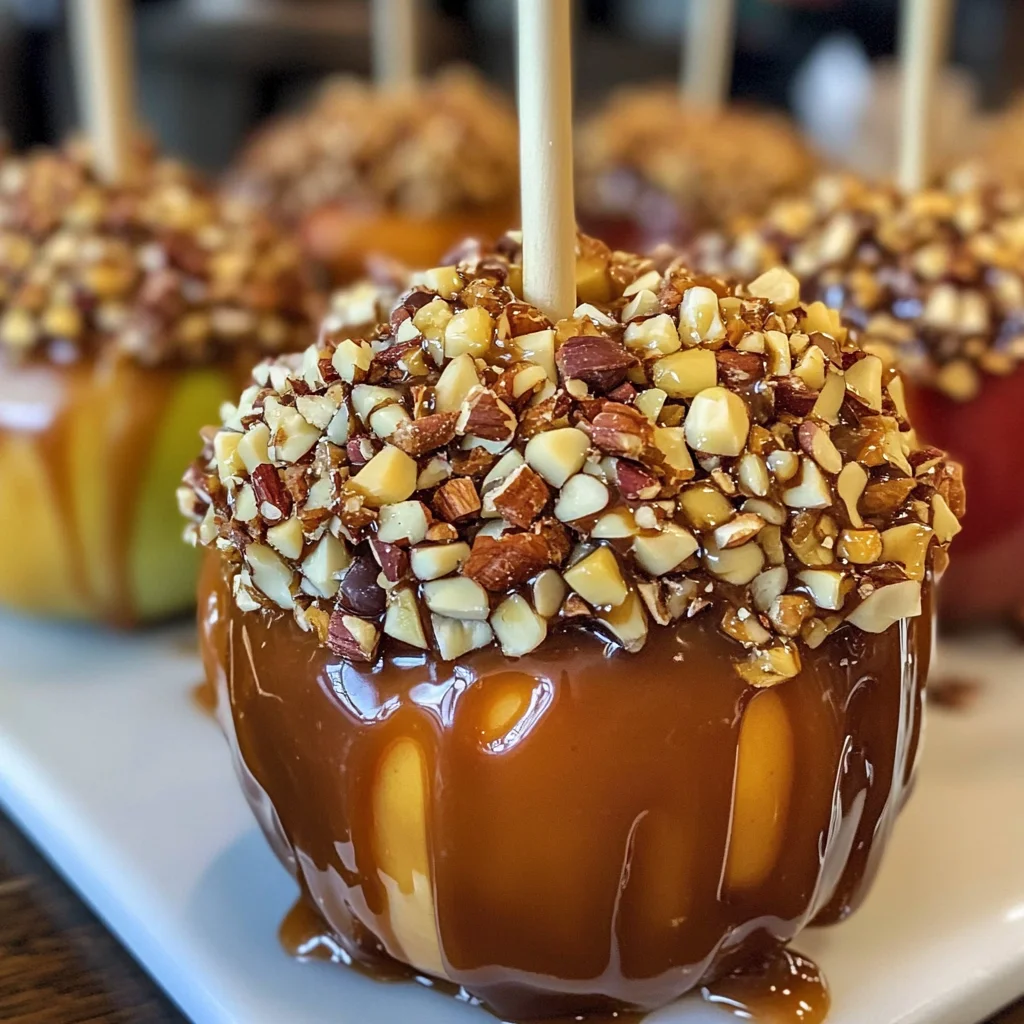
Learn the simple secrets to making the best Foolproof Homemade Caramel Apples: The Secret to Chewy, No-Slide Coating that are perfect for fall parties and Halloween treats. These decadent delights boast a chewy coating that sticks every time, making them a favorite for gatherings and celebrations.
Why You’ll Love This Recipe
- Easy to Make: With just a few simple steps, you can create gourmet caramel apples at home.
- Perfectly Chewy: Our method ensures a chewy coating that stays put, preventing any slide-off mishaps.
- Customizable Toppings: Add your favorite toppings like nuts or chocolate chips to make each apple unique.
- Ideal for Gifting: Wrap these delicious treats individually for a thoughtful homemade gift during the holidays.
- Fun for All Ages: Making caramel apples is an enjoyable activity for both kids and adults alike.
Tools and Preparation
Before diving into this delightful recipe, gather your tools to streamline the process.
Essential Tools and Equipment
- Medium saucepan
- Candy thermometer
- Baking sheet
- Parchment paper or silicone mat
- Paper towels
Importance of Each Tool
- Candy thermometer: This tool is crucial for achieving the perfect caramel consistency. It helps you monitor the temperature precisely, ensuring a chewy coating every time.
- Baking sheet: Using a baking sheet lined with parchment paper or a silicone mat prevents the apples from sticking as they cool.
Ingredients
For the Apples
- 6 medium crisp apples (Granny Smith or Honeycrisp work well)
- 12 wooden or paper lollipop sticks
For the Caramel Coating
- 1 (14-ounce) bag of soft caramel candies, unwrapped
- 2 tablespoons heavy cream
- 1 tablespoon unsalted butter
Optional Toppings
- Chopped nuts
- Mini chocolate chips
- Sprinkles
- Melted white chocolate for drizzling
How to Make Foolproof Homemade Caramel Apples: The Secret to Chewy, No-Slide Coating
Step 1: Prepare the Apples
Wash the apples well. Remove the stems and insert a wooden stick firmly into the core of each apple.
Step 2: Dry the Apples Completely
This step is crucial for the caramel to stick. Pat each apple dry with a paper towel. You can also briefly dip the apples in a bowl of ice water and then dry them thoroughly to help the coating adhere better.
Step 3: Prepare the Caramel
In a medium saucepan over medium-low heat, combine the unwrapped caramels, heavy cream, and butter. Stir constantly until the caramels are completely melted and the mixture is smooth. Do not let it boil rapidly.
Step 4: Check the Temperature (for a Chewy Coating)
Use a candy thermometer. Cook the caramel mixture, stirring gently, until it reaches 245 degrees Fahrenheit (soft-ball stage). This temperature ensures a chewy, non-runny coating.
Step 5: Cool the Caramel Slightly
Remove the saucepan from heat and let the caramel cool for about 5 to 10 minutes. It should still be pourable but slightly thicker.
Step 6: Dip the Apples
Holding the stick, tilt the pan slightly and dip one apple into the caramel, rotating it to coat evenly. Lift the apple out, allowing excess caramel to drip back into the pan.
Step 7: Apply Toppings (Optional)
If using toppings like nuts or sprinkles, apply them immediately while the caramel is still warm and sticky.
Step 8: Set the Apples
Place coated apples on a baking sheet lined with parchment paper or a silicone mat. Let them cool completely at room temperature or chill briefly in the refrigerator until firm.
Step 9: Serve or Store
Serve your gourmet caramel apples or wrap them individually for holiday gifting. Enjoy!
How to Serve Foolproof Homemade Caramel Apples: The Secret to Chewy, No-Slide Coating
Foolproof homemade caramel apples make an exciting treat for any occasion. They can be served in various delightful ways that enhance their appearance and flavor.
Individual Treats
- Serve each caramel apple on a decorative plate for individual enjoyment.
- Wrap them in clear cellophane tied with a ribbon for a charming gift.
Dessert Platter
- Arrange several coated apples on a large platter.
- Add a mix of toppings such as chopped nuts and sprinkles for visual appeal.
Fall Party Display
- Create a themed display with hay bales and pumpkins around your caramel apples.
- Use small signs to label different toppings or flavors.
Dessert Table Feature
- Include caramel apples as the star attraction on a dessert table at events like Halloween parties.
- Pair them with complementary treats like cookies or brownies.
Kids’ Party Snack
- Serve mini caramel apples on smaller sticks for children’s gatherings.
- Offer a dipping station with extra toppings like melted chocolate or colorful sprinkles.
How to Perfect Foolproof Homemade Caramel Apples: The Secret to Chewy, No-Slide Coating
Perfecting your caramel apple technique can elevate your treats from good to gourmet. Here are some essential tips to ensure success.
- Choose the right apples: Opt for crisp varieties like Granny Smith or Honeycrisp that hold up well against the caramel coating.
- Ensure dryness: Make sure the apples are completely dry before dipping; moisture can cause the caramel to slide off.
- Monitor temperature: Use a candy thermometer to reach 245 degrees Fahrenheit to achieve that chewy texture.
- Work quickly: Dip and decorate each apple promptly after making the caramel, as it thickens as it cools.
- Use parchment paper: Line your baking sheet with parchment paper to prevent sticking once cooled.
- Store properly: Keep unwrapped caramel apples in a cool place; refrigeration can cause condensation which affects texture.
Best Side Dishes for Foolproof Homemade Caramel Apples: The Secret to Chewy, No-Slide Coating
When serving foolproof homemade caramel apples, pairing them with complementary side dishes can enhance the overall experience. Here are some great options.
-
Fresh Fruit Salad
A refreshing mix of seasonal fruits provides a light balance against the sweet richness of caramel apples. -
Cheese Platter
An assortment of cheeses, particularly sharp varieties, can create an appealing contrast to the sweetness of the apples. -
Popcorn Mix
A fun and crunchy popcorn mix seasoned with spices or drizzled with chocolate makes for an enjoyable snack alongside caramel apples. -
Mini Cupcakes
Bite-sized cupcakes in fall flavors (like pumpkin spice) are perfect for adding variety to your dessert spread. -
Chocolate Fondue
Set up a chocolate fondue station so guests can dip additional fruits or snacks alongside their caramel apples. -
Warm Cinnamon Rolls
Soft, warm cinnamon rolls complement the flavor of caramel while adding a cozy touch to your dessert table.
Common Mistakes to Avoid
Making caramel apples can be fun, but it’s easy to make mistakes that lead to a less-than-perfect treat. Here are some common pitfalls and how to dodge them.
- Improper apple preparation: Not washing or drying the apples thoroughly can cause the caramel to slide off. Ensure you wash and dry each apple completely before dipping them.
- Skipping the cooling step: Dipping apples in hot caramel without letting it cool slightly can result in a runny coating. Allow the caramel to cool for 5-10 minutes before dipping.
- Rushing the temperature check: Not using a candy thermometer may lead to an incorrect consistency. Always check that your caramel reaches 245 degrees Fahrenheit for a chewy texture.
- Neglecting toppings application: Waiting too long to add toppings can result in them not sticking. Apply any nuts or sprinkles while the caramel is still warm and sticky.
- Using the wrong type of stick: Thin sticks often break under the weight of the apple. Opt for sturdy wooden or paper lollipop sticks for better support.
Storage & Reheating Instructions
Refrigerator Storage
- Duration: Store your caramel apples in the refrigerator for up to one week.
- Containers: Use an airtight container to prevent them from drying out.
Freezing Foolproof Homemade Caramel Apples: The Secret to Chewy, No-Slide Coating
- Duration: You can freeze caramel apples for up to three months.
- Containers: Wrap each apple individually in plastic wrap and place them in a freezer-safe bag.
Reheating Foolproof Homemade Caramel Apples: The Secret to Chewy, No-Slide Coating
- Oven: Preheat the oven to low heat (around 200°F) and place the apples on a baking sheet until warm.
- Microwave: Heat individual apples in 10-second intervals until warm, but avoid overheating.
- Stovetop: Place a small amount of water in a pot, heat on low, and set a plate with apples on top to warm through gently.
Frequently Asked Questions
Here are some questions commonly asked about making these delicious treats.
What makes this recipe foolproof?
This recipe provides clear instructions and temperature guidelines that ensure consistent results every time, allowing you to create perfectly chewy caramel apples.
Can I use different types of apples?
Absolutely! While Granny Smith and Honeycrisp are recommended, feel free to experiment with your favorite varieties.
How do I make my caramel thicker?
To achieve a thicker coating, let your caramel cool slightly before dipping your apples. This helps create that chewy texture you desire.
What are some fun toppings I can use?
You can get creative with toppings like chopped nuts, mini chocolate chips, or colorful sprinkles for extra flair!
How long do homemade caramel apples last?
Stored properly in an airtight container, they will last about one week in the refrigerator.
Final Thoughts
Foolproof Homemade Caramel Apples: The Secret to Chewy, No-Slide Coating is an easy recipe that promises delightful results. These treats are perfect for fall gatherings or Halloween celebrations. Plus, you can customize them with various toppings or even flavored caramels for added fun. Give this recipe a try—your friends and family will love them!
Foolproof Homemade Caramel Apples: The Secret to Chewy, No-Slide Coating
Foolproof Homemade Caramel Apples: The Secret to Chewy, No-Slide Coating is your go-to recipe for creating delectable treats that will impress at any gathering. These caramel-coated delights are not only easy to make but also customizable with a variety of toppings, making them perfect for fall parties and Halloween celebrations. With a chewy coating that stays put, these gourmet caramel apples will be a hit among kids and adults alike. Wrap them as thoughtful gifts or serve them on a dessert table for an eye-catching display. Get ready to enjoy the sweet taste of autumn with this simple yet satisfying recipe!
- Prep Time: 20 minutes
- Cook Time: 15 minutes
- Total Time: 35 minutes
- Yield: Serves 6
- Category: Dessert
- Method: Baking
- Cuisine: American
Ingredients
- 6 medium crisp apples (Granny Smith or Honeycrisp)
- 12 wooden or paper lollipop sticks
- 1 (14-ounce) bag of soft caramel candies, unwrapped
- 2 tablespoons heavy cream
- 1 tablespoon unsalted butter
- Optional toppings: chopped nuts, mini chocolate chips, sprinkles, melted white chocolate
Instructions
- Prepare the apples by washing them thoroughly and inserting a stick into each core.
- Ensure the apples are completely dry by patting them down with paper towels.
- In a medium saucepan over medium-low heat, combine the unwrapped caramels, heavy cream, and butter until melted and smooth.
- Monitor the temperature with a candy thermometer until it reaches 245°F (soft-ball stage).
- Allow the caramel to cool slightly before dipping each apple into the mixture.
- If desired, apply toppings while the caramel is still warm.
- Place coated apples on a parchment-lined baking sheet and let cool completely.
Nutrition
- Serving Size: 1 caramel apple (approximately 120g)
- Calories: 210
- Sugar: 30g
- Sodium: 50mg
- Fat: 7g
- Saturated Fat: 4g
- Unsaturated Fat: 2g
- Trans Fat: 0g
- Carbohydrates: 37g
- Fiber: 3g
- Protein: 1g
- Cholesterol: 10mg