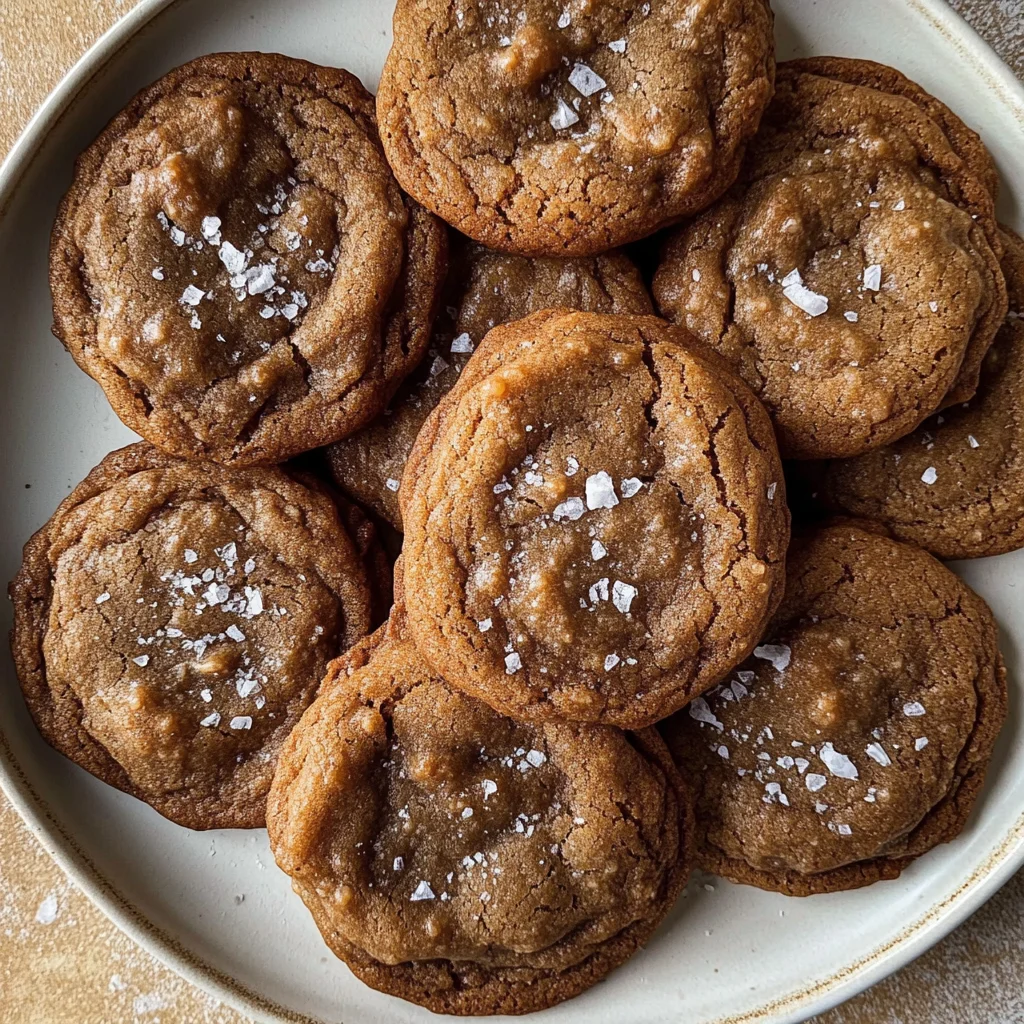
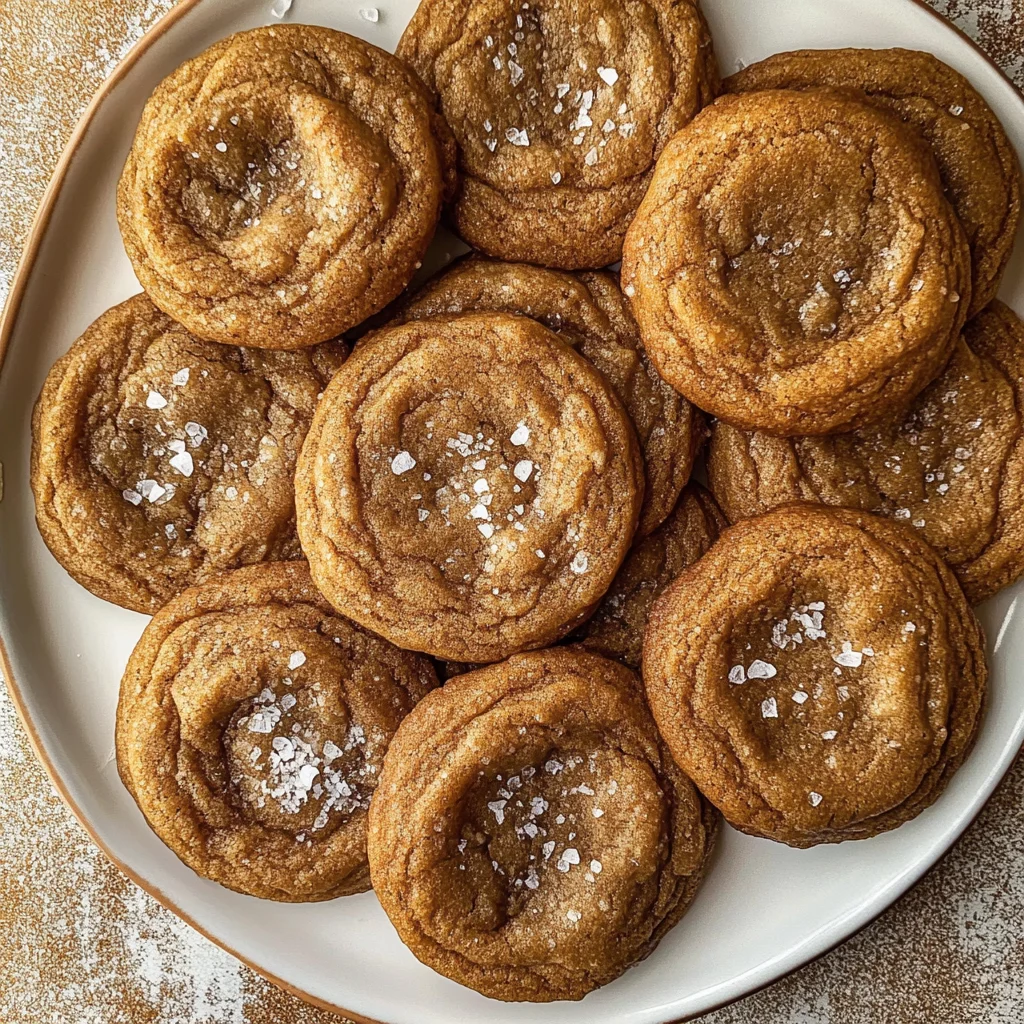
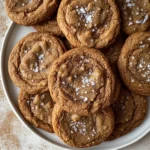
Chocolate Chipless Cookies
Soft, chewy chocolate chipless cookies are the perfect treat when you’re craving a cookie but want to skip the chocolate. These delightful cookies are versatile enough for any occasion, be it a cozy night in, a casual gathering, or simply a sweet indulgence after dinner. With their buttery flavor and satisfying chewiness, you’ll find these cookies become a favorite in no time.
Why You’ll Love This Recipe
- Easy to Make: The straightforward process makes these cookies accessible for bakers of all skill levels.
- Delicious Flavor: The caramelized butter adds a rich, nutty taste that enhances the overall cookie experience.
- Customizable: Feel free to add your favorite mix-ins like nuts or dried fruits for extra texture and flavor.
- Perfect Texture: Achieve that ideal soft and chewy consistency with just the right amount of crispness on the edges.
- No Chocolate Needed: Enjoy the classic cookie experience without chocolate chips, making them unique and tasty.
Tools and Preparation
Gathering the right tools can make your baking process smoother and more enjoyable. Here’s what you’ll need to create your chocolate chipless cookies.
Essential Tools and Equipment
- Stand mixer or handheld mixer
- Heavy-bottomed saucepan
- Mixing bowls
- Baking sheets
- Parchment paper
- Wire rack
Importance of Each Tool
- Stand mixer or handheld mixer: These make creaming butter and sugar effortless, ensuring a smooth batter.
- Heavy-bottomed saucepan: Ideal for melting butter evenly without burning, which is crucial for developing flavor.
- Parchment paper: Prevents sticking during baking, allowing for easy cookie removal from the sheets.
Ingredients
For delicious chocolate chipless cookies, gather the following ingredients:
- 1 cup unsalted butter
- 2 1/4 cups all-purpose flour
- 1 tablespoon cornstarch
- 1 teaspoon baking soda
- 1 teaspoon sea salt
- 1 cup firmly packed brown sugar
- 3/4 cup granulated sugar
- 1 large egg (room temperature)
- 1 large egg yolk (room temperature)
- 2 1/2 teaspoons vanilla extract
How to Make Chocolate Chipless Cookies
Step 1: Melt the Butter
Heat the butter in a heavy-bottomed saucepan until it is all melted, darker in color, and the milk solids are caramelized. The butter should smell nice and nutty.
Step 2: Cool the Butter
Allow the melted butter to cool down to room temperature before mixing with other ingredients.
Step 3: Combine Dry Ingredients
In a small bowl, mix together the flour, cornstarch, baking soda, and salt. Set this mixture aside for later use.
Step 4: Mix Butter and Sugars
Beat the cooled butter with both sugars using a stand mixer or handheld mixer on medium speed for about 4 – 5 minutes. The mixture should resemble very wet sand.
Step 5: Add Eggs and Vanilla
Add in the egg, yolk, and vanilla extract. Beat well until everything is combined into a smooth mixture—this should take at least another 2 – 3 minutes.
Step 6: Combine Dry Ingredients with Wet Mixture
Stir in the flour mixture gradually until just combined. Be careful not to overmix; this will help maintain that soft texture.
Step 7: Chill the Dough
Cover your bowl with plastic wrap or transfer the dough to an airtight container. Chill it in the refrigerator for at least an hour. For better flavor development, let it chill for 24 – 72 hours if you have time!
Step 8: Prepare Cookie Dough Balls
Once chilled, portion out the dough into balls using your hands or a cookie scoop. Set them aside while preheating your oven.
Step 9: Preheat Oven
Preheat your oven to 350°F (175°C). Line two baking sheets with parchment paper to prevent sticking during baking.
Step 10: Bake Cookies
Place cookie dough balls on your prepared baking sheets about 2 inches apart. Bake them for approximately 8 – 10 minutes or until they turn golden brown around the edges.
Step 11: Cool Cookies
After baking, allow the cookies to rest on the baking sheet for about 1 -2 minutes before transferring them to a wire rack to cool completely. For an extra touch of flavor, sprinkle some flaky sea salt over them while they’re still warm.
Enjoy these delightful chocolate chipless cookies as a treat any time!
How to Serve Chocolate Chipless Cookies
These chocolate chipless cookies are delightful on their own, but you can elevate your serving experience with a few simple additions. Here are some creative ways to enjoy them.
With a Glass of Milk
- Enjoying these cookies with a cold glass of milk is a classic combination that enhances the cookie’s sweet and buttery flavor.
Pair with Ice Cream
- Serve warm cookies alongside a scoop of vanilla or your favorite ice cream for a delicious dessert sundae. The warm cookie contrasts beautifully with the cold ice cream.
Drizzle with Caramel Sauce
- A drizzle of caramel sauce adds extra sweetness and richness. This makes for an indulgent treat that takes your cookies to the next level.
Top with Flaky Sea Salt
- A sprinkle of flaky sea salt on top of the warm cookies enhances their flavor and creates a delightful sweet-and-salty experience.
Serve at Parties
- These cookies make a great addition to any dessert table at parties or gatherings, offering a unique option for those who prefer treats without chocolate.
How to Perfect Chocolate Chipless Cookies
Perfecting chocolate chipless cookies is all about technique and attention to detail. Here are some tips to ensure you achieve the best results.
- Use Room Temperature Ingredients: Bringing butter and eggs to room temperature allows for better mixing and smoother dough consistency.
- Chill the Dough: Chilling the dough not only helps prevent spreading but also enhances the flavors. Aim for at least an hour, or even up to 72 hours.
- Don’t Overmix: When adding the flour mixture, mix just until combined. Overmixing can lead to tough cookies.
- Monitor Baking Time: Keep an eye on your cookies while they bake. They should be golden brown around the edges but still soft in the center.
- Store Properly: Store leftover cookies in an airtight container at room temperature to keep them chewy and fresh longer.
Best Side Dishes for Chocolate Chipless Cookies
Pairing side dishes with chocolate chipless cookies can make for a more rounded dessert experience. Here are some fantastic options:
- Fresh Fruit Salad: A light and refreshing side that balances out the sweetness of the cookies. Use seasonal fruits for variety.
- Yogurt Parfait: Layer yogurt with granola and berries for a healthy contrast that complements the richness of the cookies.
- Cheese Plate: Offer assorted cheeses like brie or cheddar alongside crackers; this savory option contrasts well with sweet treats.
- Nut Mix: A selection of roasted nuts provides crunch and additional flavor, enhancing your cookie experience.
- Mini Fruit Tarts: These add elegance to your dessert spread while providing a fruity freshness against the buttery cookies.
- Coffee or Tea: Serving these cookies alongside a hot beverage creates a comforting treat perfect for any time of day.
- Pudding Cups: Individual cups of vanilla or chocolate pudding serve as a creamy complement that pairs well with these soft cookies.
- Granola Bars: Homemade granola bars can offer additional texture and health benefits, creating a satisfying snack spread.
Common Mistakes to Avoid
When making Chocolate Chipless Cookies, avoiding common pitfalls can enhance your baking experience.
- Ignoring temperature: Always use room temperature eggs and butter. Cold ingredients can lead to uneven mixing and texture.
- Overmixing the dough: Mix just until combined after adding the flour mixture. Overmixing can lead to tough cookies.
- Not chilling the dough: Skipping the chilling step may result in flat cookies. Chilling helps develop flavor and maintain shape.
- Skipping the sea salt: Adding flaky sea salt on top enhances flavor. Don’t skip this step for a balanced taste.
- Not measuring correctly: Use proper measuring techniques for flour and sugars. Too much or too little can affect texture and taste.
Storage & Reheating Instructions
Refrigerator Storage
- Store cookies in an airtight container.
- They will last up to one week in the refrigerator.
Freezing Chocolate Chipless Cookies
- Freeze cookies in a single layer on a baking sheet before transferring to a freezer-safe container.
- They can be stored for up to three months.
Reheating Chocolate Chipless Cookies
- Oven: Preheat to 350°F, place cookies on a baking sheet, and heat for about 5 minutes until warm.
- Microwave: Heat individual cookies for about 10-15 seconds for a quick warm-up.
- Stovetop: Place cookies in a covered skillet over low heat for about 2-3 minutes until warmed through.
Frequently Asked Questions
Here are some common questions about making Chocolate Chipless Cookies.
Can I substitute other types of sugar?
Yes, you can use coconut sugar or honey instead of brown or granulated sugar. Adjust the quantities as needed.
How do I make these cookies gluten-free?
You can replace all-purpose flour with a gluten-free flour blend. Ensure it’s suitable for baking.
What if I want to add nuts or dried fruit?
Feel free to mix in your favorite nuts or dried fruits! Just remember not to add too many, as it may alter the cookie’s texture.
How should I store leftover Chocolate Chipless Cookies?
Store them in an airtight container at room temperature or refrigerate them for longer freshness.
Can I make the dough ahead of time?
Absolutely! You can prepare the dough up to three days in advance. Just chill it in the refrigerator until ready to bake.
Final Thoughts
These Chocolate Chipless Cookies are perfect for those who appreciate a classic cookie without chocolate chips. Their soft, chewy texture is versatile and delightful, making them suitable for any occasion. Feel free to customize them with your favorite mix-ins like nuts or dried fruits!
Chocolate Chipless Cookies
Indulge in the delightful simplicity of Chocolate Chipless Cookies. These soft, chewy treats offer a buttery flavor and satisfying chew without the distraction of chocolate. Perfect for any occasion, whether you’re enjoying a cozy night in or hosting a casual gathering, these cookies are sure to become a favorite. This easy-to-follow recipe allows you to customize your cookies with nuts or dried fruits, enhancing both texture and flavor. With just the right amount of crispness on the edges, each bite is a nostalgic reminder of classic cookie goodness. Gather your ingredients and discover how enjoyable baking can be!
- Prep Time: 15 minutes
- Cook Time: 10 minutes
- Total Time: 25 minutes
- Yield: Approximately 24 servings 1x
- Category: Dessert
- Method: Baking
- Cuisine: American
Ingredients
- 1 cup unsalted butter
- 2 1/4 cups all-purpose flour
- 1 tablespoon cornstarch
- 1 teaspoon baking soda
- 1 teaspoon sea salt
- 1 cup firmly packed brown sugar
- 3/4 cup granulated sugar
- 1 large egg (room temperature)
- 1 large egg yolk (room temperature)
- 2 1/2 teaspoons vanilla extract
Instructions
- Melt the butter in a heavy-bottomed saucepan until caramelized. Allow it to cool.
- In one bowl, mix flour, cornstarch, baking soda, and salt; set aside.
- Beat the cooled butter with both sugars until resembling wet sand.
- Add eggs and vanilla; mix until smooth.
- Gradually stir in dry ingredients until just combined.
- Chill dough for at least one hour (up to 72 hours for enhanced flavor).
- Preheat oven to 350°F (175°C) and line baking sheets with parchment paper.
- Portion dough into balls and place on sheets spaced apart.
- Bake for about 8–10 minutes until golden around edges.
- Cool on a wire rack and enjoy!
Nutrition
- Serving Size: 1 cookie (30g)
- Calories: 150
- Sugar: 9g
- Sodium: 90mg
- Fat: 8g
- Saturated Fat: 5g
- Unsaturated Fat: 3g
- Trans Fat: 0g
- Carbohydrates: 19g
- Fiber: <1g
- Protein: 2g
- Cholesterol: 20mg