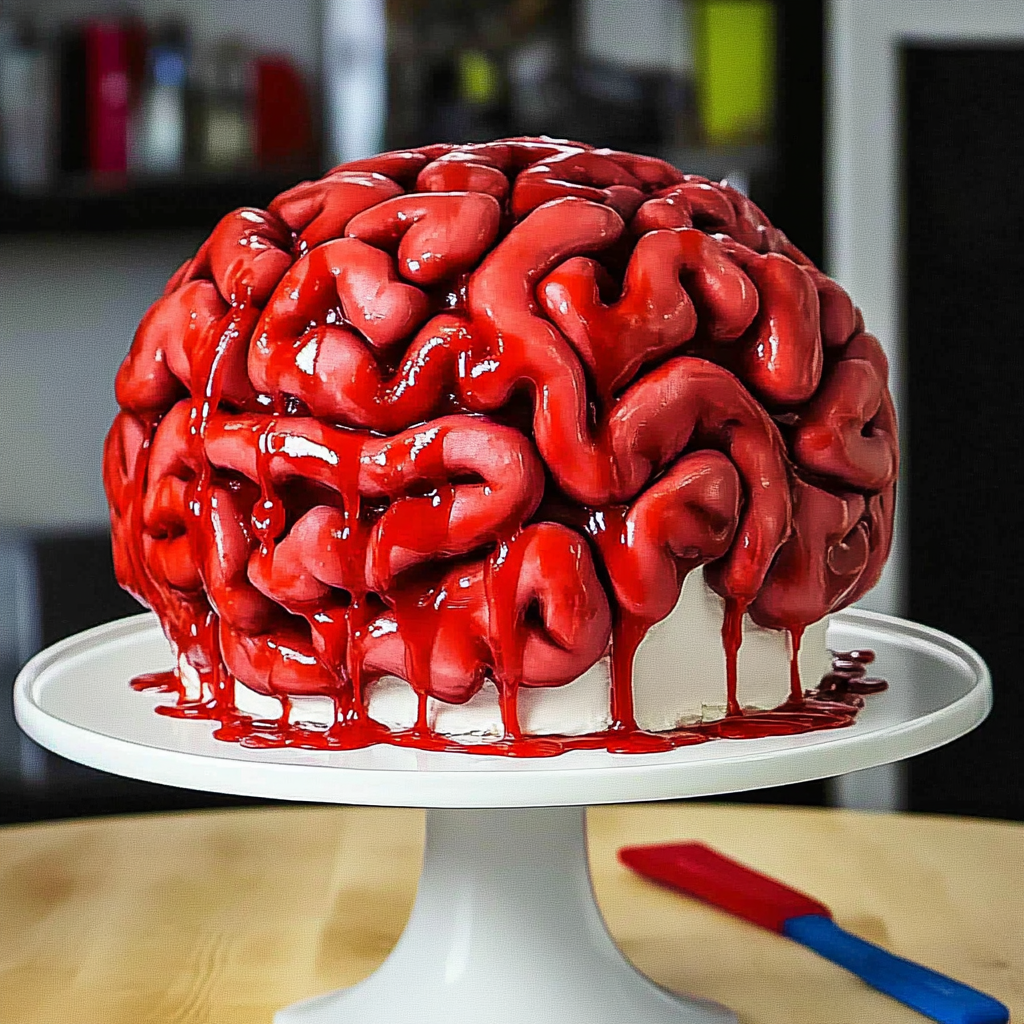
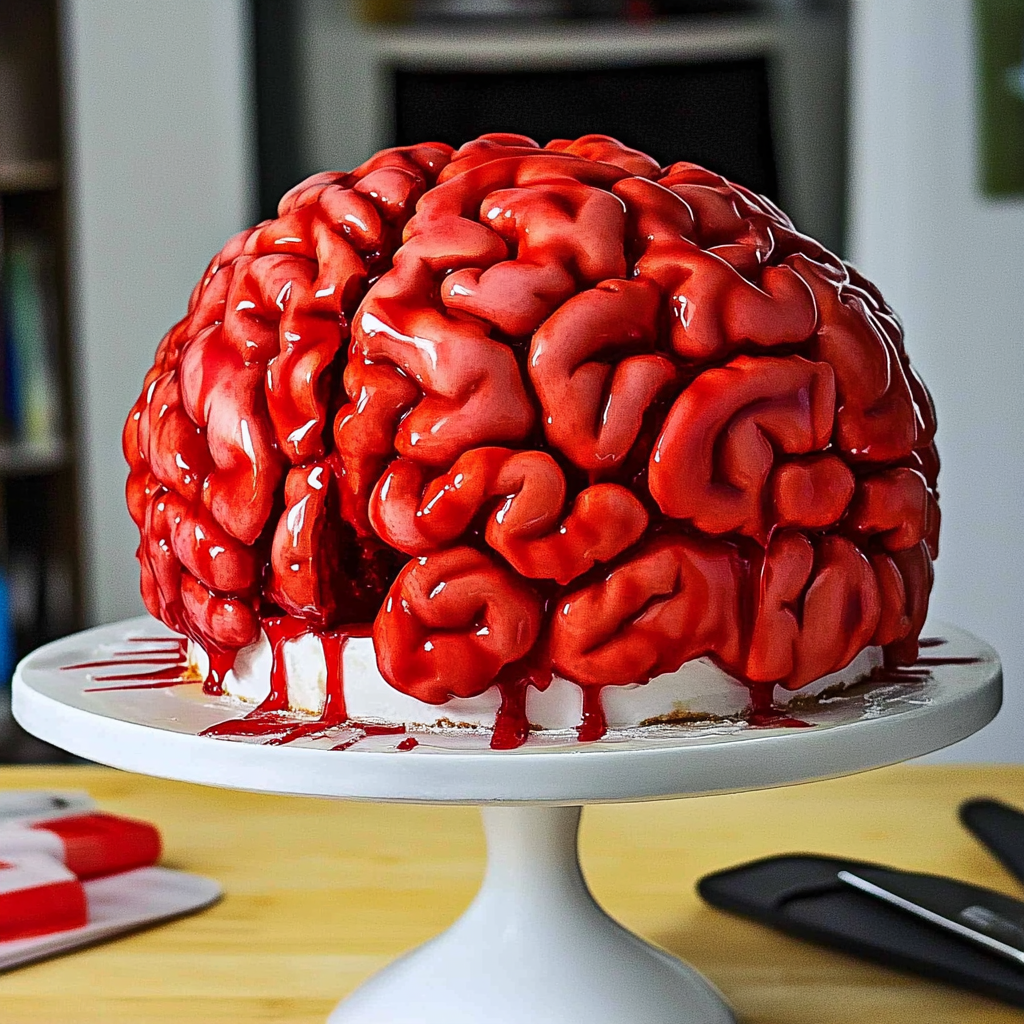
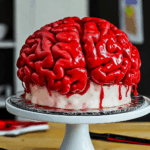
Brain Cake
This Brain Cake is a show-stopping dessert that will thrill your guests at any Halloween party. Its vibrant red velvet layers, creamy pink buttercream, and raspberry jam create a delightful treat that’s as visually striking as it is delicious. Not only is this cake perfect for Halloween, but it also works wonderfully for themed birthday parties or any fun gathering. Its unique brain shape adds an extra touch of creativity that everyone will love!
Why You’ll Love This Recipe
- Eye-Catching Design: This cake’s brain shape makes it a memorable centerpiece for any occasion.
- Delicious Flavor: The combination of red velvet and raspberry jam offers a sweet and tangy taste that delights the palate.
- Easy to Make: With straightforward instructions, even novice bakers can successfully create this showstopper.
- Versatile Uses: Perfect for Halloween, birthday parties, or any fun event where you want to impress.
- Customizable Decoration: You can easily adjust colors and toppings to match your theme or personal preferences.
Tools and Preparation
To make this Brain Cake, you’ll need a few essential tools. Having the right equipment can make your baking experience smoother and more enjoyable.
Essential Tools and Equipment
- Round cake pans
- Mixing bowls
- Hand mixer or stand mixer
- Spatula
- Cooling rack
Importance of Each Tool
- Round cake pans: These are crucial for achieving the perfect cake shape. They ensure even baking and help create the layered structure needed for the brain effect.
- Mixing bowls: Using multiple mixing bowls allows you to prepare different components separately, making assembly easier later on.
- Hand mixer or stand mixer: A good mixer speeds up the creaming process for the butter and sugar, ensuring a light and fluffy batter.
- Cooling rack: This tool helps cool the cakes evenly, preventing sogginess and ensuring they slice beautifully.
Ingredients
Here’s what you’ll need to create this delightful Brain Cake:
For the Cake
- 2 1/2 cups cake flour (300g)
- 2 Tbsp unsweetened cocoa powder, sifted (10g)
- 1 tsp baking soda (6g)
- 1/2 tsp fine salt (3g)
- 1/2 cup (1 stick) unsalted butter, room temperature (113g)
- 1 3/4 cups granulated sugar (350g)
- 2 large eggs, room temperature (112g)
- 1 1/4 cups buttermilk, room temperature (300g)
- 1/2 cup vegetable or canola oil (120g)
- 2 tsp vanilla extract or vanilla bean paste (8g)
- 1 tsp white vinegar (4g)
- 1 tsp red gel food coloring (or 1 Tbsp liquid food coloring)
For the Buttercream
- 1 1/2 cups (3 sticks) unsalted butter, room temperature (339g)
- 1 cup (8 oz) full-fat cream cheese, room temperature (226g)
- 1 Tbsp vanilla extract or vanilla bean paste (12g)
- 1 tsp fine salt (6g)
- 7 cups powdered sugar (904g or a 2lb. bag)
- 3 Tbsp heavy whipping cream, room temperature (45g)
- small squirt of red gel food coloring (or 1 tsp liquid food coloring)
For the Raspberry Jam Filling
- 1/2 cup seedless raspberry or strawberry jam
- 3 Tbsp water (45g)
- (optional: 1/4 tsp red gel food coloring or 1 tsp liquid food coloring)
How to Make Brain Cake
Step 1: Preheat the Oven
Start by preheating your oven to 350°F (175°C). Grease and flour two round cake pans.
Step 2: Prepare the Cake Batter
In a large mixing bowl:
1. Combine the cake flour, cocoa powder, baking soda, and salt; whisk together.
2. In another bowl, cream together unsalted butter and granulated sugar until light and fluffy.
3. Add eggs one at a time, mixing well after each addition.
4. Mix in buttermilk, oil, vanilla extract, white vinegar, and red gel food coloring until smooth.
5. Gradually add dry ingredients to wet mixture until just combined.
Step 3: Bake the Cakes
Pour the batter evenly into prepared pans:
– Bake for about 27 minutes or until a toothpick inserted in the center comes out clean.
– Allow cakes to cool in pans for 10 minutes before transferring them to a cooling rack.
Step 4: Make Buttercream Frosting
While cakes cool:
1. In a separate bowl, beat together unsalted butter and cream cheese until creamy.
2. Gradually add powdered sugar while mixing on low speed.
3. Add heavy whipping cream and mix until fluffy; incorporate salt and red gel food coloring.
Step 5: Assemble Your Brain Cake
Once cooled:
– Slice each cake layer in half horizontally if desired for extra layers.
– Spread raspberry jam between layers before frosting with pink buttercream.
– Decorate top with remaining buttercream in a brain-like pattern.
Now you’re ready to impress with your stunning Brain Cake! Enjoy this festive treat at your next celebration!
How to Serve Brain Cake
Serving your Brain Cake can be as fun and creative as making it! This spooky dessert is perfect for Halloween parties or themed events. Here are some serving suggestions to impress your guests.
Festive Presentation
- Use a spooky cake stand to elevate the cake’s appearance.
- Garnish with fake spiders or edible glitter for a dramatic touch.
Individual Servings
- Cut the cake into small squares and serve on decorative plates.
- Top each piece with a dollop of raspberry jam for a bloody effect.
Themed Decorations
- Surround the cake with plastic eyeballs or mini skeletons for a creepy vibe.
- Use themed napkins and utensils that match the Halloween spirit.
Pair with Desserts
- Serve alongside Halloween-themed cupcakes or cookies for variety.
- Create a dessert table featuring assorted sweet treats that complement the Brain Cake.
How to Perfect Brain Cake
To achieve the perfect Brain Cake, pay attention to detail during preparation and decorating. Here are some tips to ensure success:
- Use Room Temperature Ingredients: Ensure butter, eggs, and buttermilk are at room temperature for better mixing.
- Sift Dry Ingredients: Always sift flour and cocoa powder together to avoid lumps in your batter.
- Monitor Baking Time: Check your cake a few minutes before the suggested baking time to prevent overbaking.
- Cool Completely Before Frosting: Let the cake layers cool fully on racks before applying frosting; this prevents melting.
- Experiment with Colors: Feel free to adjust food coloring amounts for more vibrant shades if desired.
- Add Texture: Consider adding crushed cookies or sprinkles on top of the frosting for an extra crunch.
Best Side Dishes for Brain Cake
Pairing your Brain Cake with complementary side dishes can enhance the overall experience. Here are some delightful options:
- Pumpkin Soup
A creamy pumpkin soup offers warmth and flavor, making it perfect for fall gatherings. - Savory Cheese Platter
An assortment of cheeses paired with crackers provides a savory contrast to the sweetness of the cake. - Garlic Breadsticks
Crispy breadsticks brushed with garlic butter can be an excellent savory treat alongside dessert. - Roasted Vegetables
Roasted seasonal vegetables bring color and nutrition to your spread, balancing out the sweetness of the cake. - Spinach Salad
A fresh spinach salad with nuts and cranberries adds a refreshing crunch that complements rich desserts well. - Stuffed Mushrooms
These bite-sized savory treats provide an elegant touch that pairs nicely with sweeter flavors. - Fruit Skewers
Colorful fruit skewers add freshness and are easy for guests to grab while mingling. - Chips and Salsa
A crunchy snack like tortilla chips with zesty salsa creates a fun contrast against the decadent cake.
Common Mistakes to Avoid
Making a brain cake can be a fun experience, but it’s important to avoid common pitfalls.
- Not using room temperature ingredients: Cold ingredients can lead to uneven mixing and baking. Be sure to let your eggs, butter, and buttermilk sit out before you start.
- Skipping the food coloring: A brain cake needs that signature red hue! Don’t forget to add the gel food coloring; it’s essential for the look.
- Overmixing the batter: Mixing too much can make the cake dense. Stir until just combined for a light and fluffy texture.
- Ignoring baking times: Every oven is different. Keep an eye on your cake as it bakes, and use a toothpick to check for doneness.
- Not letting the cake cool completely: Frosting a warm cake can cause the icing to melt. Make sure your layers are completely cool before decorating.
Storage & Reheating Instructions
Refrigerator Storage
- Store in an airtight container for up to 3 days.
- If possible, keep layers separated by parchment paper to prevent sticking.
Freezing Brain Cake
- Wrap individual slices tightly in plastic wrap, then place them in a freezer-safe bag.
- Can be frozen for up to 3 months. Thaw in the refrigerator overnight before serving.
Reheating Brain Cake
- Oven: Preheat to 350°F (175°C) and warm for about 10-15 minutes until heated through.
- Microwave: Heat individual slices on low power for about 20-30 seconds until warm.
- Stovetop: Use a non-stick pan on low heat, cover with a lid, and heat for about 5 minutes.
Frequently Asked Questions
How do I make a Brain Cake without fondant?
You can achieve a brain cake design using buttercream decorations and food coloring instead of fondant. Just pipe the buttercream into brain shapes!
What flavors work well with Brain Cake?
Red velvet is traditional, but you can experiment with chocolate or vanilla cake bases as well. Just ensure the frosting matches your theme.
Can I customize my Brain Cake?
Absolutely! You can add different fillings like fruit preserves or change the color of your frosting for unique variations.
What are some creative ideas for decorating my Brain Cake?
Consider adding edible glitter, gummy worms, or even chocolate shavings to enhance its creepy appearance!
Final Thoughts
This brain cake recipe is not just perfect for Halloween; it’s versatile enough for any celebration! Feel free to customize it with different flavors and decorations. Give it a try, and impress your friends with this fun and spooky dessert!
Brain Cake
Create a spooky yet delicious Brain Cake with moist layers and vibrant frosting! Try this fun recipe today for your next celebration!
- Prep Time: 30 minutes
- Cook Time: 27 minutes
- Total Time: 57 minutes
- Yield: Approximately 12 servings 1x
- Category: Dessert
- Method: Baking
- Cuisine: American
Ingredients
- 2 1/2 cups cake flour (300g)
- 2 Tbsp unsweetened cocoa powder, sifted (10g)
- 1 tsp baking soda (6g)
- 1/2 tsp fine salt (3g)
- 1/2 cup (1 stick) unsalted butter, room temperature (113g)
- 1 3/4 cups granulated sugar (350g)
- 2 large eggs, room temperature (112g)
- 1 1/4 cups buttermilk, room temperature (300g)
- 1/2 cup vegetable or canola oil (120g)
- 2 tsp vanilla extract or vanilla bean paste (8g)
- 1 tsp white vinegar (4g)
- 1 tsp red gel food coloring (or 1 Tbsp liquid food coloring)
- 1 1/2 cups (3 sticks) unsalted butter, room temperature (339g)
- 1 cup (8 oz) full-fat cream cheese, room temperature (226g)
- 1 Tbsp vanilla extract or vanilla bean paste (12g)
- 1 tsp fine salt (6g)
- 7 cups powdered sugar (904g or a 2lb. bag)
- 3 Tbsp heavy whipping cream, room temperature (45g)
- 1/2 cup seedless raspberry or strawberry jam
- 3 Tbsp water (45g)
- (optional: 1/4 tsp red gel food coloring or 1 tsp liquid food coloring)
Instructions
- Preheat the oven to 350°F (175°C) and grease two round cake pans.
- In a large mixing bowl, combine the cake flour, cocoa powder, baking soda, and salt; whisk together.
- In another bowl, cream together unsalted butter and granulated sugar until light and fluffy.
- Add eggs one at a time, mixing well after each addition.
- Mix in buttermilk, oil, vanilla extract, white vinegar, and red gel food coloring until smooth.
- Gradually add dry ingredients to wet mixture until just combined.
- Pour the batter evenly into prepared pans and bake for about 27 minutes or until a toothpick inserted in the center comes out clean.
- Allow cakes to cool in pans for 10 minutes before transferring them to a cooling rack.
- In a separate bowl, beat together unsalted butter and cream cheese until creamy.
- Gradually add powdered sugar while mixing on low speed.
- Add heavy whipping cream and mix until fluffy; incorporate salt and red gel food coloring.
- Once cooled, slice each cake layer in half horizontally if desired for extra layers.
- Spread raspberry jam between layers before frosting with pink buttercream.
- Decorate the top with remaining buttercream in a brain-like pattern.
Nutrition
- Serving Size: 1 serving
- Calories: 370
- Sugar: 34g
- Sodium: 210mg
- Fat: 17g
- Saturated Fat: 8g
- Unsaturated Fat: 9g
- Trans Fat: 0g
- Carbohydrates: 53g
- Fiber: 1g
- Protein: 4g
- Cholesterol: 50mg