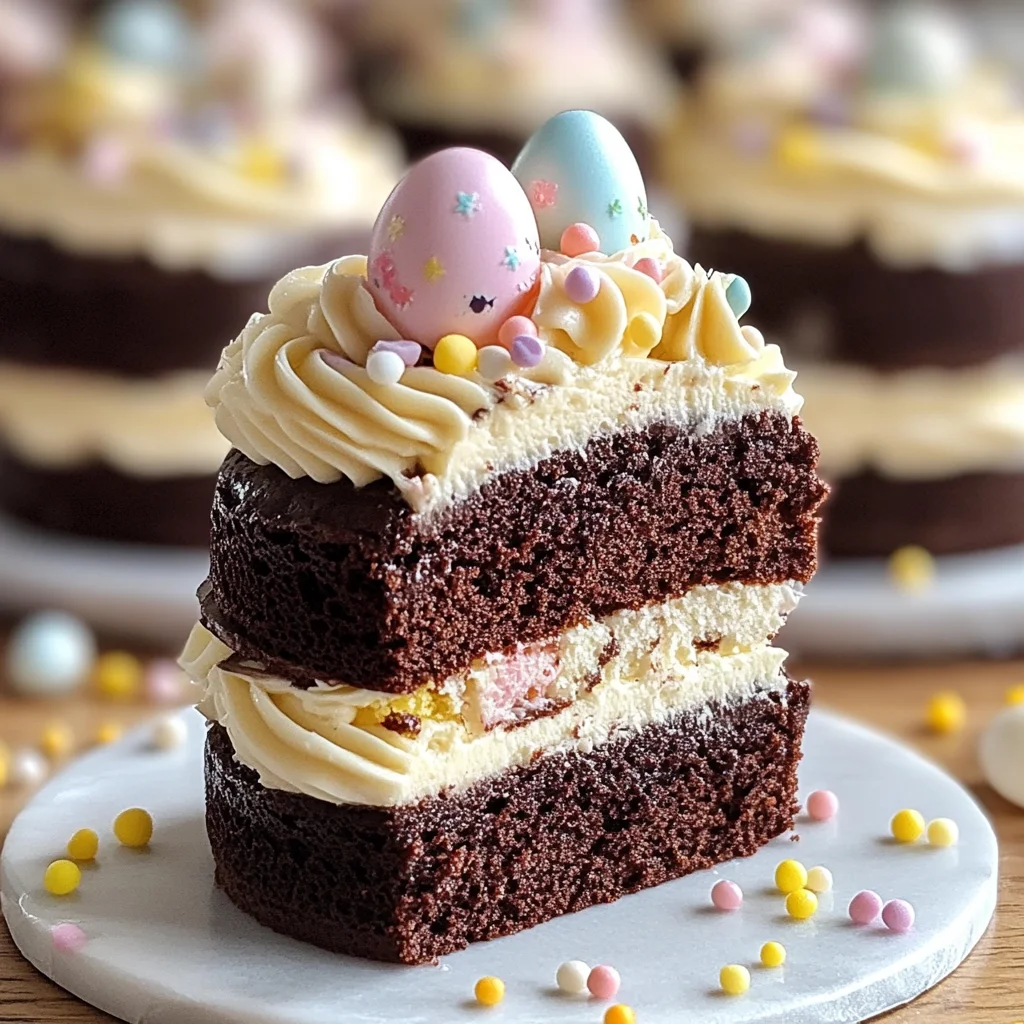
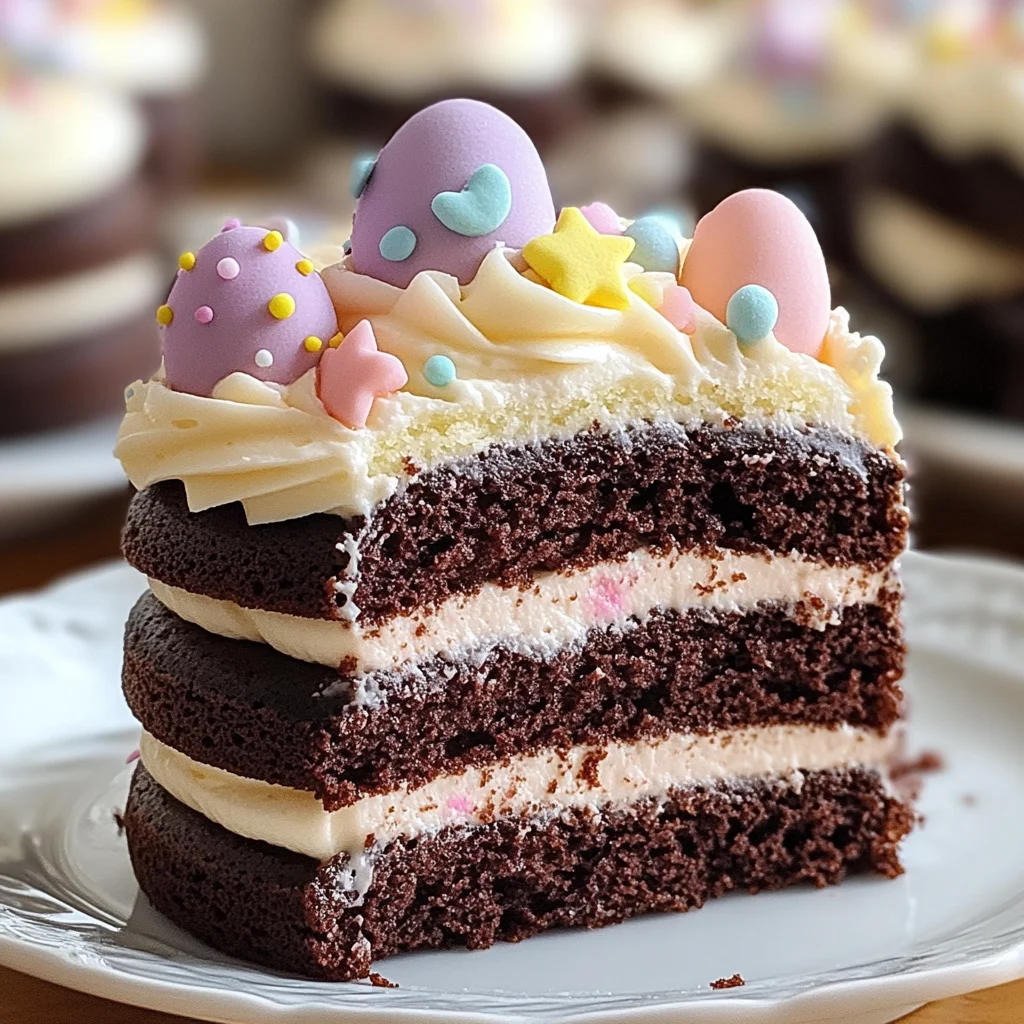
Mini Easter Layer Cakes – A Sweet Spring Treat!
Mini Easter Layer Cakes – A Sweet Spring Treat! are a delightful way to celebrate the season. With their rich chocolate flavor and vibrant decorations, these mini cakes are perfect for Easter gatherings, spring parties, or any festive occasion. Their charming size and beautiful layers make them a standout dessert that’s sure to impress guests of all ages.
Why You’ll Love This Recipe
- Easy to Make: This recipe features simple steps, making it accessible even for novice bakers.
- Rich Flavor: The combination of Ghirardelli chocolate and creamy buttercream offers an indulgent taste experience.
- Versatile Decoration: Personalize your mini cakes with various toppings like sprinkles or colored frosting to match your celebration.
- Perfect Portions: Mini sizes mean you can enjoy a sweet treat without overindulging.
- Great for Sharing: These cakes are easy to transport and share, making them ideal for potlucks or family gatherings.
Tools and Preparation
Before diving into the baking process, gather your tools for a smooth experience. Having everything ready will make preparation easier and more enjoyable.
Essential Tools and Equipment
- Mixing bowls
- Measuring cups and spoons
- Electric mixer
- Round cake cutter
- Cake pans (8 or 9 inches)
- Wax paper
- Cooling rack
Importance of Each Tool
- Electric mixer: Ensures ingredients are blended thoroughly and quickly, saving time and effort.
- Round cake cutter: Helps create uniform mini layers, leading to attractive presentation.
- Cooling rack: Allows cakes to cool evenly without trapping moisture, preventing sogginess.
Ingredients
For the Cake:
- 1 ½ cups Ghirardelli Sweet Ground Chocolate and Cocoa
- 2 cups flour
- 1 cup granulated sugar
- 1 tsp baking soda
- ½ tsp cream of tartar
- ½ tsp salt (optional)
- 1 ½ cups buttermilk
- 1 cup butter, softened
- 4 eggs
- 1 tsp pure vanilla extract
For the Buttercream Frosting:
- ½ cup shortening
- ½ cup butter, softened
- 1 tsp vanilla extract
- 4 cups confectioners’ sugar
- 2 tbsp milk
How to Make Mini Easter Layer Cakes – A Sweet Spring Treat!
Step 1: Preheat the Oven
Preheat your oven to 350°F (175°C). Grease two 8-inch or 9-inch round cake pans with butter or non-stick spray. Line the bottoms with wax paper for easy removal.
Step 2: Make the Cake
- In a large mixing bowl, combine the flour, Ghirardelli chocolate, granulated sugar, baking soda, cream of tartar, and salt.
- Add 1 cup of buttermilk and 1 cup of softened butter. Beat on medium speed for about 2 minutes until well combined.
- Mix in the remaining ½ cup of buttermilk along with the eggs and vanilla extract. Beat until smooth.
- Divide the batter evenly between the prepared cake pans.
- Bake for 30–45 minutes or until a toothpick inserted in the center comes out clean.
- Allow the cakes to cool in the pans for 10–15 minutes before transferring them to a wire rack. Let them cool completely.
Step 3: Make the Buttercream Frosting
- In a large bowl, cream together shortening and softened butter until light and fluffy.
- Add vanilla extract.
- Gradually mix in confectioners’ sugar one cup at a time. Beat well after each addition until fully combined.
- Finally, add milk and continue mixing until fluffy. Keep covered until you’re ready to frost your cakes.
Step 4: Assemble & Decorate
Once cooled:
* Use a round cutter to cut out mini layers from each larger cake.
* Stack these layers with buttercream frosting in between each layer.
* Frost the outside of each mini cake with additional buttercream frosting.
* Decorate with Easter sprinkles, mini eggs, or pastel-colored frosting for that festive touch!
How to Serve Mini Easter Layer Cakes – A Sweet Spring Treat!
Serving Mini Easter Layer Cakes can elevate your spring celebrations. These delightful cakes are perfect for tea parties, family gatherings, or festive brunches. Here are some creative ways to enjoy them.
Individual Dessert Plates
- Present each mini cake on a charming dessert plate for an elegant touch.
- Add a dollop of whipped cream or a scoop of vanilla ice cream on the side.
Cake Stands
- Use tiered cake stands to showcase several mini cakes at once.
- This creates an eye-catching centerpiece that guests will love.
Picnic Treats
- Wrap each mini layer cake in colorful napkins for a fun picnic snack.
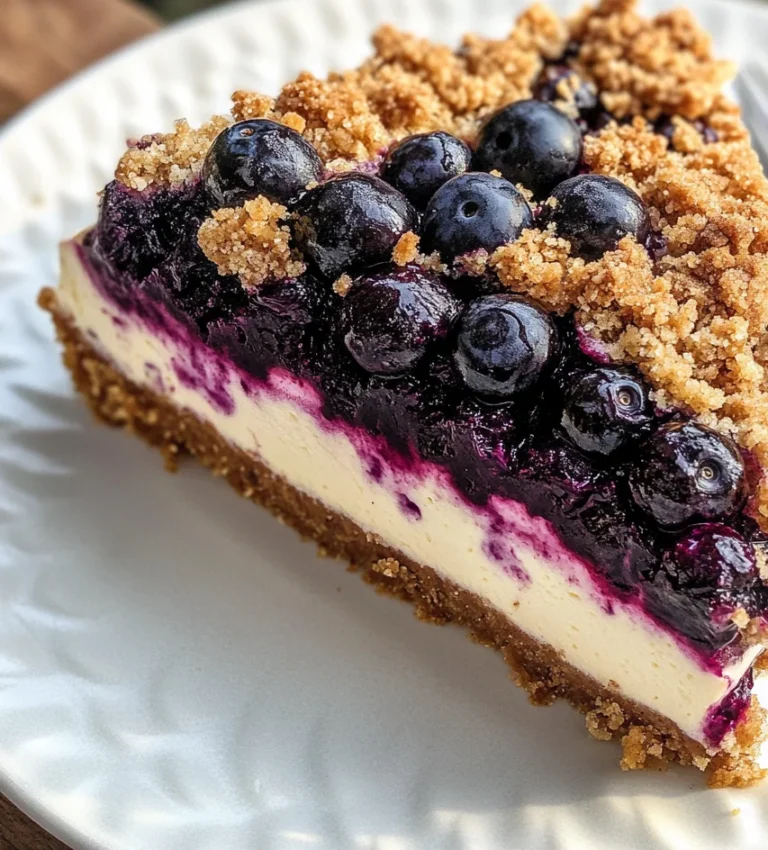
- Pair them with fresh fruit like strawberries or blueberries for a refreshing contrast.
Dessert Buffet
- Include these mini cakes on a dessert buffet table alongside other treats.
- Offer various toppings such as chocolate shavings, edible flowers, or fruit compote for customization.
Easter Brunch Centerpiece
- Place the mini cakes in the center of your Easter brunch table.
- Surround them with pastel-colored eggs and fresh flowers for a festive display.
How to Perfect Mini Easter Layer Cakes – A Sweet Spring Treat!
Perfecting your Mini Easter Layer Cakes is key to impressing your guests. Here are some helpful tips to ensure they turn out beautifully every time.
- Choose Quality Ingredients: Always use high-quality cocoa powder and chocolate for the best flavor in your cakes.
- Room Temperature Ingredients: Make sure your butter and eggs are at room temperature for easier mixing and better texture.
- Properly Grease Pans: Grease your cake pans well to prevent sticking. Using parchment paper can also help ensure easy removal.
- Cool Completely: Allow your cakes to cool completely before frosting. This helps avoid melting the buttercream and keeps layers intact.
- Use an Offset Spatula: For frosting, an offset spatula allows you to spread the buttercream smoothly without damaging the cake.
- Experiment with Decorations: Get creative with decorations! Use sprinkles, fresh fruits, or edible flowers that match the festive theme.
Best Side Dishes for Mini Easter Layer Cakes – A Sweet Spring Treat!
Pairing side dishes with your Mini Easter Layer Cakes can enhance the overall meal experience. Here are some delicious options to consider:
- Fresh Fruit Salad: A mix of seasonal fruits adds freshness and balance to the sweetness of the cakes.
- Spring Pea Salad: Light and vibrant, this salad brings a crunchy texture that complements dessert well.
- Quinoa Salad: Toss quinoa with vegetables and herbs for a nutritious side that pairs well with sweet flavors.
- Roasted Vegetables: Serve a medley of roasted carrots, asparagus, and bell peppers for a savory contrast.
- Caprese Skewers: Fresh mozzarella, basil, and cherry tomatoes drizzled with balsamic glaze make delightful finger foods.
- Mini Sandwiches: Prepare assorted mini sandwiches with turkey or chicken salad for a hearty addition that balances desserts.
Enjoy creating delightful moments around your Mini Easter Layer Cakes!
Common Mistakes to Avoid
When making Mini Easter Layer Cakes, it’s easy to overlook some key steps. Here are common mistakes to avoid:
- Bold preparation: Not preparing your pans correctly can lead to sticking. Always grease and line your cake pans with wax paper for easy removal.
- Bold overmixing: Mixing the batter too much can make your cakes dense. Mix just until combined for a light texture.
- Bold incorrect measurements: Using incorrect ingredient amounts can ruin the cake’s balance. Always measure ingredients accurately using proper tools.
- Bold ignoring cooling time: Cutting the cake too soon can cause it to crumble. Let the cakes cool completely before assembling.
- Bold skipping decoration: Neglecting decoration makes your cakes less festive. Use sprinkles or pastel colors to enhance visual appeal.
Storage & Reheating Instructions
Refrigerator Storage
- Store in an airtight container for up to 5 days.
- Place parchment paper between layers if stacking to prevent sticking.
Freezing Mini Easter Layer Cakes – A Sweet Spring Treat!
- Wrap individual layers tightly in plastic wrap, then in aluminum foil.
- Freeze for up to 3 months for best quality.
Reheating Mini Easter Layer Cakes – A Sweet Spring Treat!
- Oven: Preheat to 350°F (175°C) and warm for about 10-15 minutes.
- Microwave: Heat slices on medium power for 20-30 seconds until warmed through.
- Stovetop: Place slices in a non-stick pan over low heat, covering with a lid until heated.
Frequently Asked Questions
Here are some common questions about making Mini Easter Layer Cakes:
How do I make Mini Easter Layer Cakes – A Sweet Spring Treat! gluten-free?
To make these cakes gluten-free, substitute regular flour with a gluten-free blend that works well in baking.
Can I use other flavors instead of chocolate?
Absolutely! You can replace the chocolate with lemon or vanilla flavors for a different twist on this recipe.
How do I decorate my Mini Easter Layer Cakes?
Use colorful frosting, sprinkles, or edible decorations like mini eggs and flowers for a festive look.
Can I make this recipe ahead of time?
Yes! You can bake the cakes and freeze them, then assemble and decorate closer to your event.
Final Thoughts
Mini Easter Layer Cakes are not only visually stunning but also versatile. You can customize them with different flavors and decorations. They are perfect for spring celebrations and sure to impress your guests. Try making these delightful treats today!
Mini Easter Layer Cakes – A Sweet Spring Treat!

Mini Easter Layer Cakes are a delightful way to celebrate the vibrant spring season. These charming, rich chocolate cakes, adorned with colorful decorations, bring joy to any festive occasion. Perfect for gatherings and family celebrations, these mini treats are not only visually appealing but also easy to make, ensuring that even novice bakers can create an impressive dessert. Layered with creamy buttercream frosting and decorated with fun sprinkles or pastel colors, they offer a delicious bite-sized indulgence without the guilt of overindulgence. Get ready to impress your guests and elevate your spring festivities with these sweet delights!
- Prep Time: 20 minutes
- Cook Time: 35 minutes
- Total Time: 55 minutes
- Yield: Approximately 12 mini cakes 1x
- Category: Dessert
- Method: Baking
- Cuisine: American
Ingredients
- 1 ½ cups Ghirardelli Sweet Ground Chocolate and Cocoa
- 2 cups flour
- 1 cup granulated sugar
- 1 tsp baking soda
- ½ tsp cream of tartar
- 1 ½ cups buttermilk
- 1 cup butter, softened
- 4 eggs
- ½ cup shortening
- ½ cup butter, softened
- 1 tsp vanilla extract
- 4 cups confectioners' sugar
- 2 tbsp milk
Instructions
- Preheat the oven to 350°F (175°C) and prepare two round cake pans lined with wax paper.
- In a large bowl, mix flour, cocoa powder, sugar, baking soda, cream of tartar. Add buttermilk and softened butter; beat until smooth.
- Incorporate eggs and vanilla extract; mix until well combined.
- Divide batter into prepared pans and bake for 30–45 minutes until a toothpick comes out clean.
- Cool cakes before using a round cutter to create mini layers.
- For frosting: Cream shortening and butter together; add vanilla and gradually mix in confectioners' sugar and milk until fluffy.
- Assemble mini cakes by layering frosting between cutouts and decorating as desired.
Nutrition
- Serving Size: 1 serving
- Calories: 210
- Sugar: 18g
- Sodium: 150mg
- Fat: 9g
- Saturated Fat: 4g
- Unsaturated Fat: 4g
- Trans Fat: 0g
- Carbohydrates: 31g
- Fiber: 1g
- Protein: 3g
- Cholesterol: 35mg